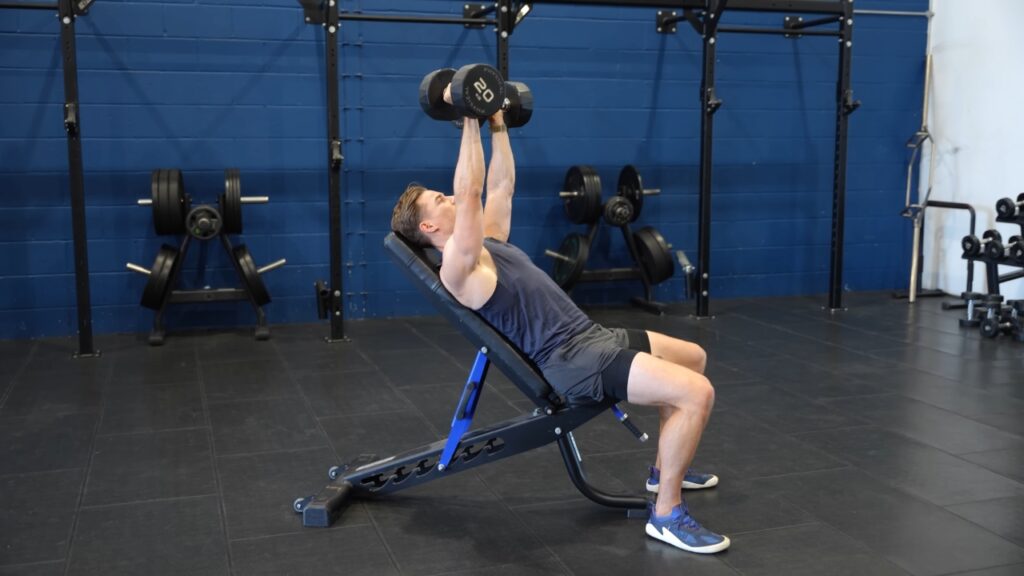
The incline dumbbell press is one of our favourite ways to train the upper chest, although we think most people would benefit from lowering their bench a notch.
Around 30 degrees is our preferred starting angle. It gives the clavicular portion of the pectoralis major a useful pressing position without turning the exercise into something that looks suspiciously like a shoulder press.
The incline dumbbell press works the entire chest, with particular emphasis on the upper pecs. Your anterior deltoids and triceps also contribute, and the angle of the bench changes how that work is distributed.
Good form comes down to a few details: a sensible incline, stable shoulders, an elbow path that suits your anatomy, and enough range of motion to make the exercise worthwhile.
Let’s get those right before worrying about how much weight is on the dumbbells.
Start With a 30-Degree Bench Angle
View this post on Instagram
We recommend starting your incline dumbbell press at approximately 30 degrees above horizontal.
It’s a practical middle ground. The bench is high enough to change the pressing mechanics compared with a flat press, while remaining low enough to keep substantial emphasis on the chest.
You can use a 15- or 20-degree incline, too. Some people will find those positions more comfortable, particularly if they experience shoulder discomfort at steeper angles.
There’s research behind our preference.
A 2020 study involving 30 participants examined pectoralis major, anterior deltoid, and triceps activity during bench presses at five different angles: 0, 15, 30, 45, and 60 degrees.
The researchers found the greatest activation of the upper pectoralis major at 30 degrees. At steeper inclines, anterior deltoid involvement increased, particularly at 60 degrees.
An earlier bench-angle study also found increased upper-pec activation during certain portions of the pressing movement at 30 and 45 degrees compared with flat pressing.
There’s an important limitation here. Both studies examined muscle activation during barbell pressing. We can use those findings to inform dumbbell training, although the exercises have different stabilization demands and pressing paths.
Electromyography (EMG) also measures electrical activity in muscles. It doesn’t directly measure long-term muscle growth.
Still, the evidence gives us a reasonable starting point: use a moderate incline and adjust according to your mechanics.
If you don’t own an adjustable bench, our dumbbell chest workout without a bench provides alternatives that don’t require improvising an unstable setup.
Why 45 Degrees Is Usually Higher Than You Need
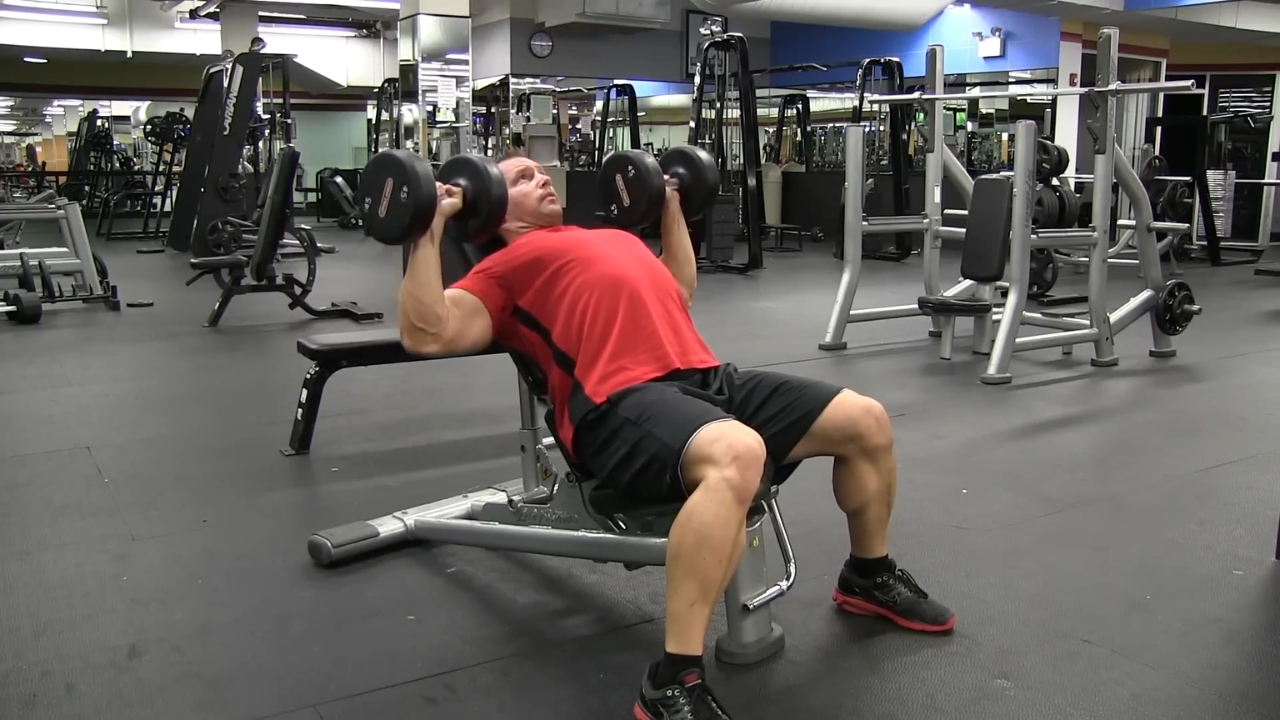
The upper chest contributes to raising the arm forward and bringing it across the body. As you increase the bench angle, you change the direction of the pressing movement relative to your torso.
A moderate incline can increase the contribution of the clavicular pec fibers. Keep raising the bench, though, and the exercise places progressively greater demands on shoulder flexion.
Your anterior deltoids are particularly well equipped for that movement.
Here’s how we generally approach different bench angles.
| Bench angle | Our assessment |
| 15 degrees | Mild incline and a good option if 30 degrees bothers your shoulders |
| 30 degrees | Our preferred starting point for upper-chest training |
| 45 degrees | A workable variation with greater shoulder involvement |
| 60+ degrees | Increasingly resembles a shoulder press |
There’s nothing inherently wrong with 45 degrees. You can build your chest at that angle.
We simply don’t see much reason to start there when your primary goal is upper-pec development.
One more detail matters: the same bench angle won’t feel identical for everyone. Torso proportions, shoulder mobility, and individual pressing mechanics all influence the movement.
Treat 30 degrees as a starting point worth testing rather than a sacred number.
How to Set Up the Incline Dumbbell Press
A good incline press begins with a stable setup. Wrestling heavy dumbbells into position before every set is a poor use of energy.
Here’s how we recommend performing it:
- Set the bench: Adjust the backrest to approximately 30 degrees.
- Position the dumbbells: Sit upright with one dumbbell resting on each thigh.
- Get into position: Use a controlled knee assist to bring the dumbbells toward your shoulders as you lean back.
- Establish your base: Keep your feet planted, hips supported, and upper back against the bench.
- Set your shoulders: Gently draw your shoulder blades back and down to establish stability.
- Lower the weights: Bring the dumbbells down beside your upper chest with your elbows moving slightly outward.
- Press upward: Drive through your chest and triceps, allowing the dumbbells to move slightly inward as your arms extend.
At the top, your hands should finish above your upper chest and shoulders, with your elbows extended comfortably.
There’s no benefit to deliberately crashing the dumbbells together.
We also prefer a natural pressing path over an exaggerated attempt to squeeze the weights toward one another. The dumbbells can move inward slightly as your arms extend without forcing additional movement through the shoulders.
When the set finishes, bring the dumbbells back toward your thighs as you sit up, using a controlled movement. Avoid dropping heavy weights unpredictably beside the bench.
Don’t Flare Your Elbows Straight Out
Elbow position is one of the biggest differences between a comfortable incline press and a movement that irritates your shoulders.
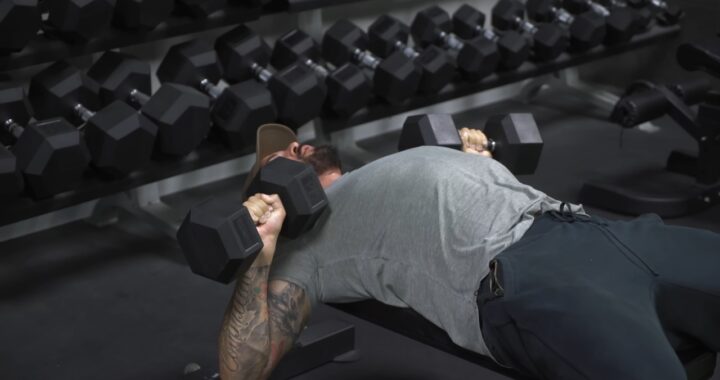
We generally recommend keeping your upper arms approximately 30 to 60 degrees away from your torso during the lowering phase.
That leaves room for individual variation.
With your elbows flared straight out, the shoulder can end up in an awkward position at the bottom. Excessively tucking your elbows, meanwhile, changes the pressing mechanics and can place greater emphasis on your triceps.
There’s another useful checkpoint: keep your forearms reasonably vertical near the bottom of the movement.
When viewed from the front, your wrists should sit approximately above your elbows.
If the dumbbells drift far outside your elbows, you create unnecessary leverage demands. If your wrists collapse inward, maintaining a strong pressing position becomes harder.
We’d rather see a natural elbow path that you can repeat consistently than someone trying to maintain an exact 45-degree angle through every repetition.
Lower the Dumbbells Far Enough to Actually Use the Range of Motion
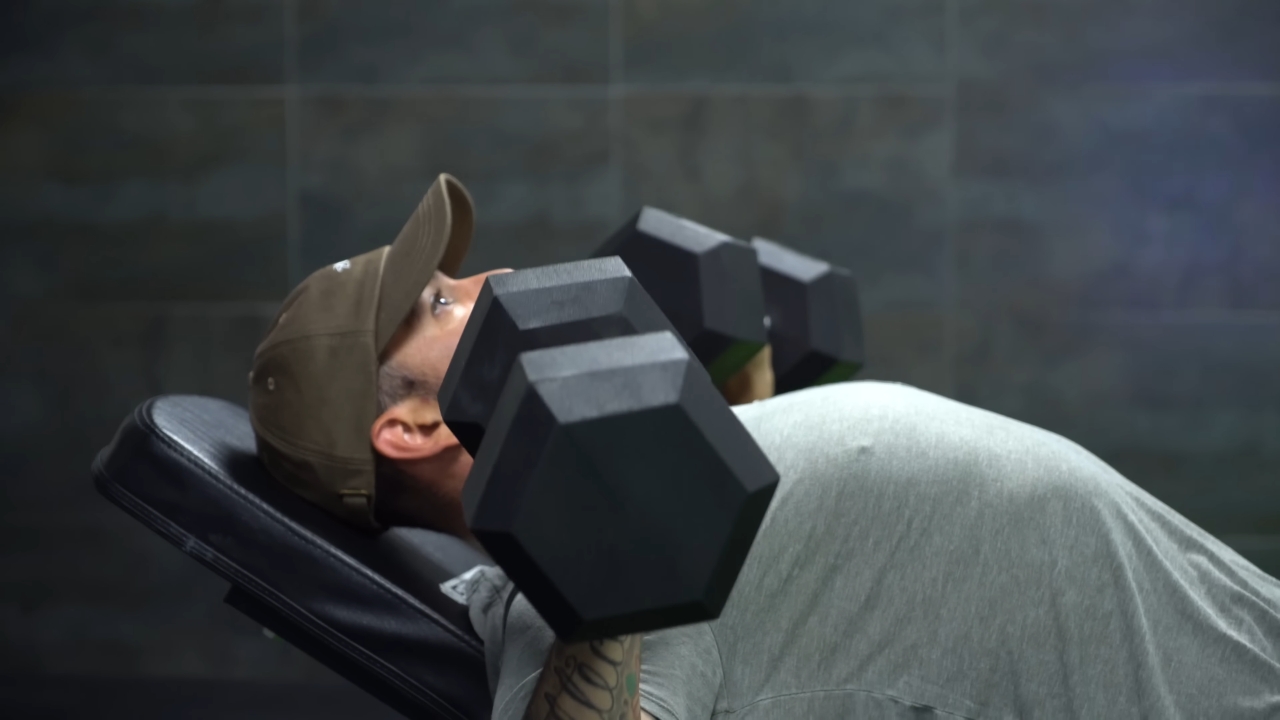
A surprisingly common problem in dumbbell pressing is sacrificing range of motion as the weights increase.
The lifter starts with a respectable pressing depth. A few weight increases later, the dumbbells barely descend past shoulder height.
The numbers improve on paper, although the exercise has changed considerably.
For an incline dumbbell press, we recommend lowering the weights until you feel a comfortable stretch across your chest while maintaining control of your shoulders.
For many lifters, the dumbbells will reach approximately the sides of the upper chest, with the upper arms moving slightly below the torso.
However, the deepest possible position isn’t automatically the best position for everyone.
Bench width, shoulder mobility, upper-arm length, and dumbbell size all affect how far you can lower the weights comfortably.
Our rule is to use the greatest practical range of motion that remains controlled and pain-free.
If the bottom position consistently bothers your shoulders, experiment with a slightly different grip, elbow position, or bench angle. Reduce the depth if necessary, and don’t push through sharp pain.
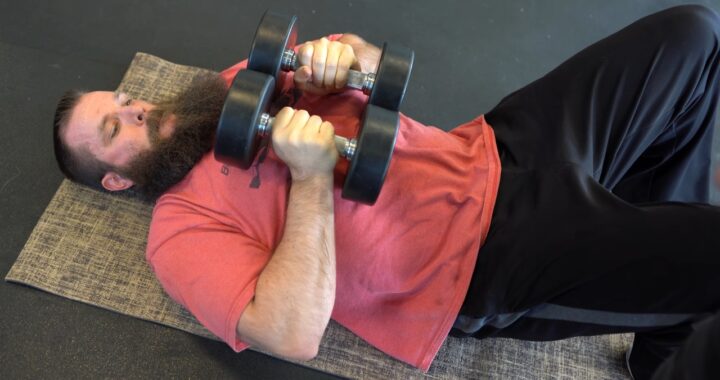
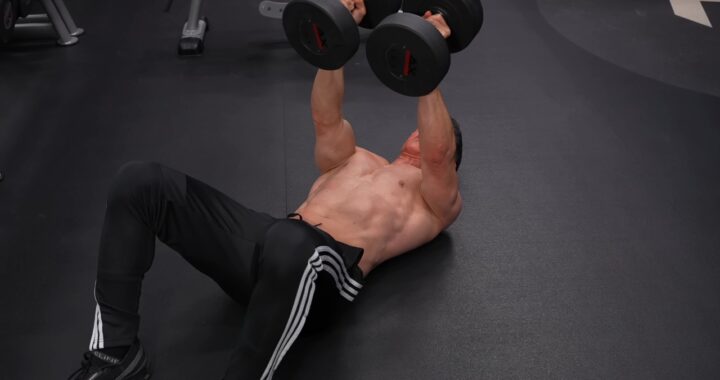
For lifters who need a shorter pressing range, the dumbbell floor press provides a useful alternative. The floor stops the upper arms before they reach the deeper position available on a bench.
Keep Your Shoulders on the Bench
Your shoulder blades provide a stable foundation for pressing.
Before starting the set, gently bring them back and down against the bench. Keep your upper back supported as you lower and press the dumbbells.
We don’t recommend squeezing the shoulder blades together as hard as humanly possible. Excessive tension can make the setup unnecessarily rigid.
A firm, comfortable position is enough.
Watch what happens as the dumbbells approach the bottom. If your shoulders roll forward and your upper back loses contact with the bench, the weight or depth may be exceeding what you can control.
Something similar can happen at the top when people keep reaching forward to force the dumbbells together.
Finish the press with controlled elbow extension and your shoulders supported.
Your chest can work perfectly well without turning the final few centimetres into an exaggerated shoulder movement.
Use a Neutral or Semi-Neutral Grip If It Feels Better
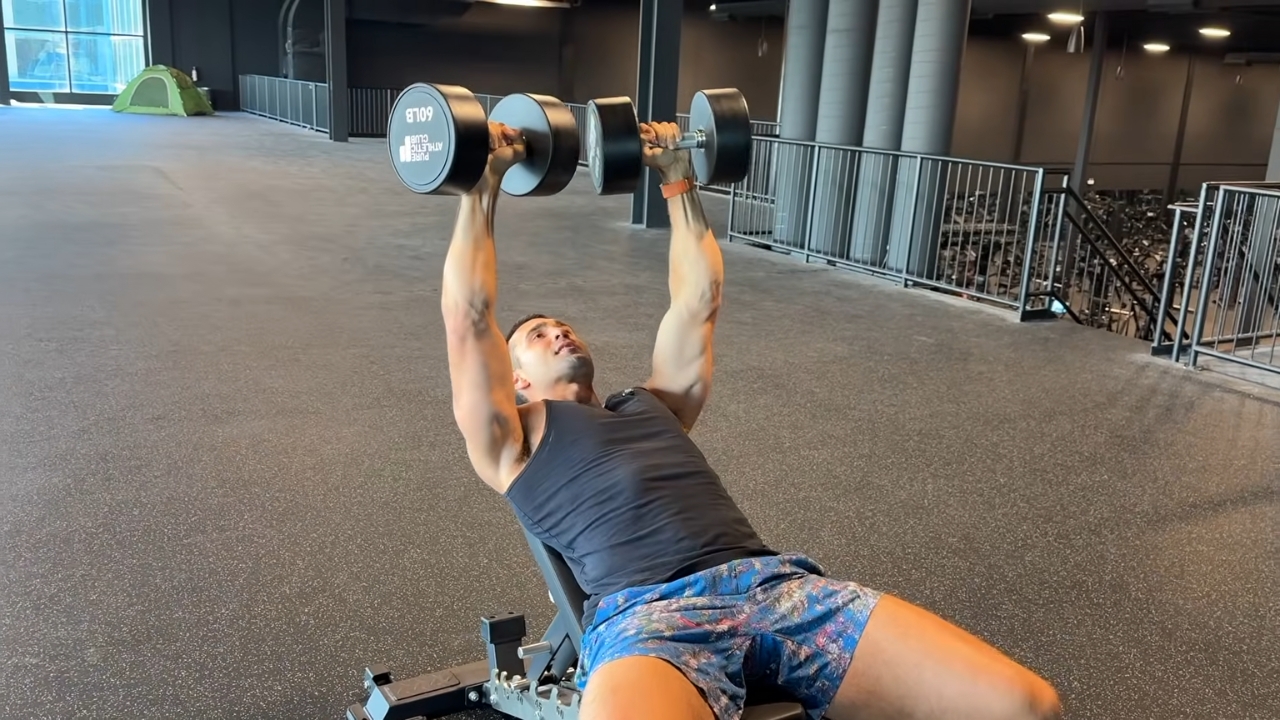
The traditional incline dumbbell press uses a pronated grip, with your palms facing forward.
That works well for plenty of people, but we wouldn’t insist on it if a slight adjustment makes the exercise more comfortable.
A semi-neutral grip, with the palms angled somewhat toward each other, allows the elbows to follow a slightly different path.
For some lifters, that position feels more natural around the shoulder joint.
Here’s how we approach it:
- Pronated grip: A good default when the shoulders feel comfortable, and the press remains controlled.
- Semi-neutral grip: Worth trying if you prefer a slightly tucked elbow position.
- Fully neutral grip: Another usable option, although it changes the pressing mechanics and may shift the emphasis.
There’s no need to rotate your wrists dramatically during every repetition.
Choose a grip, maintain reasonably consistent wrist alignment, and concentrate on producing force through the movement.
The grip that allows a strong, repeatable press through a comfortable range is usually the one we’d keep.
How Heavy Should You Go?
For hypertrophy, we like using the incline dumbbell press for approximately 6 to 15 repetitions per set.
That range gives you enough loading flexibility while keeping the exercise practical.
Very heavy sets of three or four can work for strength, although positioning the dumbbells becomes increasingly demanding. Higher-repetition sets can also build muscle, but fatigue from stabilizing the weights may become a limiting factor.
Our preferred setup looks like this:
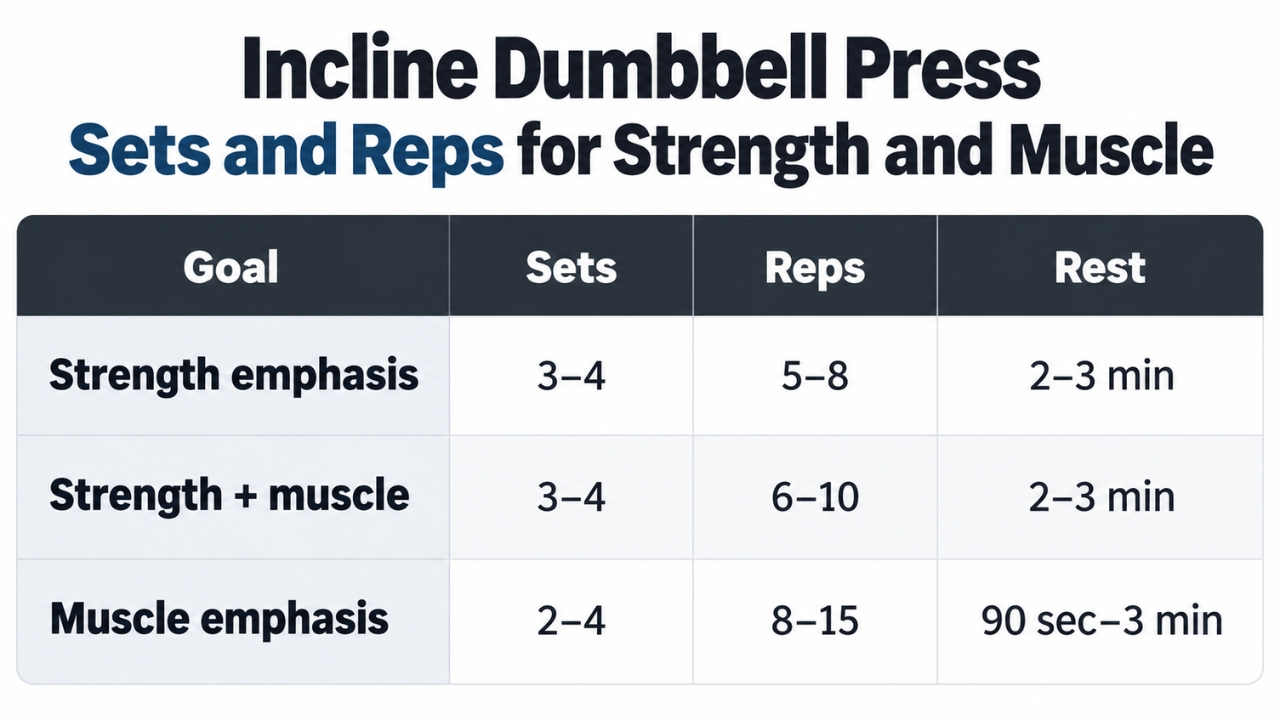
These are programming recommendations, not rigid physiological boundaries.
For muscle growth, aim to finish most working sets with approximately one to three repetitions in reserve.
You can build muscle using lighter dumbbells and higher repetitions when the sets are sufficiently challenging.
Progression should also remain straightforward.
Let’s say you’re doing three sets of eight with the same dumbbells. Over subsequent sessions, work toward three sets of twelve without compromising your form.
Once you reach the top of your target range, increase the weight and build up again.
For demanding sets, longer rest between exercises can help preserve performance.
The ACSM’s 2026 resistance-training guidance reinforces the importance of consistent training and appropriate programming for strength and hypertrophy.
We agree with the general direction. A simple exercise performed progressively over several months deserves more attention than complicated training methods that change every week.
Where the Incline Dumbbell Press Belongs in a Chest Workout
If upper-chest development is a major goal, place the incline dumbbell press near the beginning of your workout.
That’s when you’ll usually have the most energy available to maintain pressing performance.
Here’s a straightforward chest session:
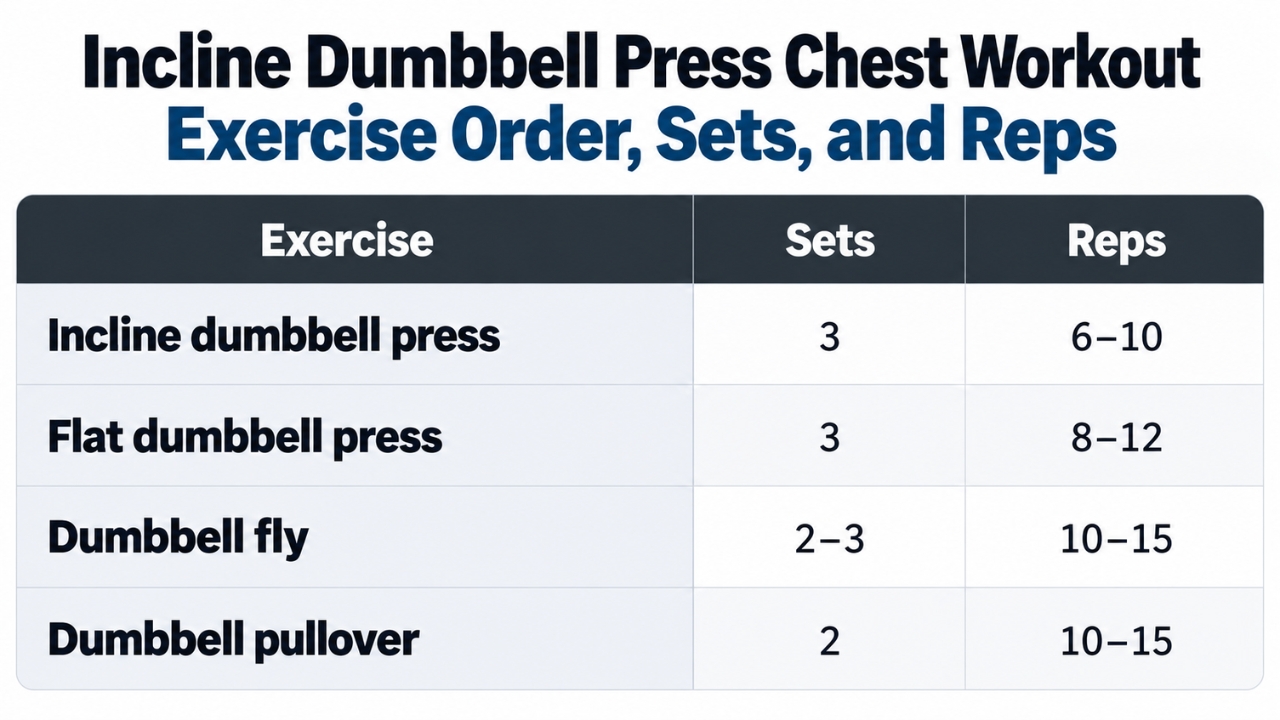
That provides eight working sets, which can be plenty for one session, depending on your weekly training volume and experience.
You can also use the incline dumbbell press as your main chest exercise in a full-body program.
For an upper-body workout, we’d combine it with a pulling exercise such as single-arm dumbbell rows. Driving the elbow toward the hip generally places greater emphasis on the lats.
Our 3-day dumbbell workout offers an example of distributing compound exercises across the training week.
One thing worth mentioning: you don’t automatically need five different pressing variations to develop your chest.
The flat dumbbell press and incline press already provide useful training at different angles.
Add further exercises when they serve a clear purpose. Extra movements should contribute enough to justify their place in the workout.
Common Incline Dumbbell Press Mistakes
Most incline pressing problems come down to a few recurring technique issues.
1. Setting the Bench Too High
A steep incline increases shoulder involvement. Start around 30 degrees and adjust only when there’s a reason.
2. Using Too Much Weight
If your range of motion shrinks substantially, your shoulders lose position, or every repetition becomes a struggle for balance, reduce the load.
3. Excessively Flaring the Elbows
Keep your elbows in a comfortable position between fully tucked and directly out to the sides.
4. Losing Upper-Back Stability
Maintain a supported pressing position throughout the set. Avoid letting the shoulders roll forward at the bottom.
5. Rushing the Lowering Phase
Control the descent and reverse direction smoothly. There’s no need to bounce through the bottom.
6. Forcing the Dumbbells Together
Finish each repetition with controlled elbow extension. The weights don’t have to collide.
7. Constantly Changing the Exercise
Switching bench angles, grips, and rep ranges every session makes progression difficult to assess.
We’re particularly opinionated about that last point.
If you’ve found a version of the incline press that feels comfortable, allows good range of motion, and can be progressively loaded, give it enough time to work.
Consistency makes it much easier to tell whether your training is producing results.
A Lower Incline Is the Better Starting Point
@d0nfit ⚠️How to: Master the Dumbbell Incline Press A Guide to Perfect Form & Maximum Gains💪🏽 Hurry and elevate your chest day with the Dumbbell Incline Press, fine-tuned for precision and power. Setting your bench at a 15-30-degree incline and adjusting your grip can transform a standard exercise into a targeted, muscle-building movement. Here’s how to do it right: **1. Setting the Stage:** Before you even lift a dumbbell, ensure your bench is set to a 30-degree incline. This angle is optimal for targeting the upper chest without placing undue stress on the shoulders, striking the perfect balance between engagement and safety. **2. Grip and Elbow Positioning:** As you grip the dumbbells, turn your elbows in 45 degrees towards your torso. This isn’t just about comfort; it’s about biomechanics. This angle promotes a more natural movement path for the shoulders and elbows, reducing injury risk and increasing pectoral muscle activation. **3. The Lift:** With the dumbbells at shoulder height, press upwards in a smooth, controlled motion. The key here is to avoid letting the dumbbells touch at the top. Why? Maintaining a slight distance between them ensures constant tension on the chest muscles, enhancing the stimulus for growth. **4. Mind Your Form:** Throughout the movement, keep your feet planted, your back slightly arched, and your core engaged. These subtleties in form contribute to a solid foundation, enabling you to press heavier weights over time while minimizing the risk of injury. **Why This Works:** – **Targeted Muscle Activation**: The 30-degree incline angle specifically targets the clavicular head of the pectoralis major, contributing to that coveted upper chest development. – **Reduced Shoulder Strain**: Turning your elbows in 45 degrees aligns your arm and shoulder in a safer, more effective lifting position. – **Continuous Tension**: Avoiding dumbbell contact at the top of the press keeps your muscles under constant work, key for muscle endurance and growth. **Incorporate this technique into your next chest day routine for a noticeable difference in both strength and aesthetics. Whether you’re aiming to improve your physique, enhance your performance, or simply switch up your workout, the Dumbbell Incline Press with these adjustments is your new go-to. How to perform the Dumbbell Incline Press, Chest Workouts, Upper Body Strength, Muscle Building Techniques, Exercise Safety, Fitness Tips, Home Gym Essentials, Workout Routines, Strength Training, Body Sculpting, Pectoral Exercises, Gym Equipment, Physical Fitness, Health and Wellness, Personal Training Strategies #InclinePress #ChestDay #UpperChestWorkout #FitnessTok #HomeWorkout #StrengthBuilding #MuscleMagic #DumbbellWorkout #FitFam #GymLife #WorkoutTips #BodyBuilding #GetStrong #FitnessMotivation #ExerciseRoutine #workoutsforbeginners #gymtok #didyouknow #tiktokhumanitiescampaign ♬ original sound – d0n
The incline dumbbell press doesn’t need an elaborate technical checklist.
Start around 30 degrees. Keep your feet planted, your upper back supported, and your wrists aligned with your forearms. Lower the dumbbells through a comfortable range and press upward without excessive elbow flare.
Then work on getting stronger while keeping those mechanics consistent.
Our preference is a moderate incline because it provides a useful balance between upper-chest emphasis and manageable shoulder involvement.
Some lifters will prefer 20 degrees. Others will press comfortably at 35 or 45.
That’s fine. The goal is to find a bench angle that allows you to train the chest effectively, progress your lifts, and repeat the exercise without unnecessary discomfort.
A slightly lower bench and a few months of consistent progression will usually accomplish more than endlessly searching for the perfect pressing angle.